Chimborazo and The Highest Man on Earth

Mount Chimborazo as seen from the city of Riobamba

Discovering a Goal by Chance

I remember the exact moment I learned about Chimborazo with total clarity. It was shortly after I had trekked the Inca Trail to Machu Picchu. One evening in the dining tent after we had consumed an abundance of carbohydrates to replenish precious calories and our group was settling down with some mate de coca, a couple of members of the group began speaking of their experiences in Ecuador. They talked about how beautiful some “Cotopaxi” volcano was and my interest was immediately piqued.


Once back in the United States I was yearning for another adventure and the conversation that night in the tent stuck in my mind… “Cotopaxi”. I began to research Cotopaxi and in the process began to learn about Ecuador’s massive volcanoes. While spiraling down this internet wormhole I learned, much to my surprise, that the highest point on Planet Earth is in Ecuador… the summit of Mount Chimborazo. I remember the exact moment I first read about it and it instantly became my obsession to climb to the summit of that mountain. I wanted to claim the title of “The Highest Person on Earth”

The Highest Place on Earth

“I’m climbing to the Highest place on the Planet”

“You’re going to Mount Everest?!?!”

“No I’m going to Mount Chimborazo in Ecuador, because the Earth bulges at the center the summit of Mount Chimborazo is actually closer to the sun and outer space than the summit of Everest.”

*visible confusion*

For months that was the conversation I had every time someone asked me about this goal and what I was training so hard for. Given this it only seems appropriate to give some cold hard background facts and numbers on Mount Chimborazo before discussing the details of the preparation and the climb.

· The summit of Mount Chimborazo is 20,561’ above sea level (6,384 m).

· The summit of Chimborazo is 2.1 km closer to outer space than the summit of Everest

· Chimborazo has a prominence of 13,527’, making it the 16th most prominent peak in the world.

· Chimborazo is a dormant stratovolcano. The last major eruption was around 640 AD.

· The upper mountain is heavily glaciated and is subject to severe weather and avalanches.

· The first successful summit was made by Edward Whymper in 1880.

· In 1993 Chimborazo became the site of the worst mountaineering accident in Ecuadorian history with 10 climbers being killed in an Avalanche just under the Veintemilla Summit.

· The mountain pictured on Ecuador’s flag is Chimborazo.

Alright so those are the matter-of-fact cliff notes on Chimborazo. Obviously taking on this mountain was going to be considerably more difficult and dangerous than trekking the Inca Trail. (Talk about an understatement!)

This Isn’t Just a Hike

I’ve lived in the Northeast United States for my entire life. The highest mountain here is Mount Washington (6,288’) in New Hampshire. My first time ever being at considerable altitude was on the Inca Trail and for a very brief hike to the top of the Rainbow Mountain in Peru (17,060’). I recall the Rainbow Mountain hike being difficult at the time and having some mild symptoms of altitude sickness. I also remember seeing some people unfortunate enough to be hit hard by altitude sickness being taken off the mountain in ambulances… (much more dramatic than my hyperventilating, headache, and rush to an outhouse.)

Where I was trying to go the air would be much thinner, the terrain would be much more technical and dangerous, and there would be no medical or evacuation help available if something did go wrong.

The summit of Chimborazo is at 20,561′

The objectify what “thinner” air actually means… the summit of Chimborazo would only have about 46% of the amount of oxygen that is present in the thick oxygen-rich air surrounding my sea-level home!

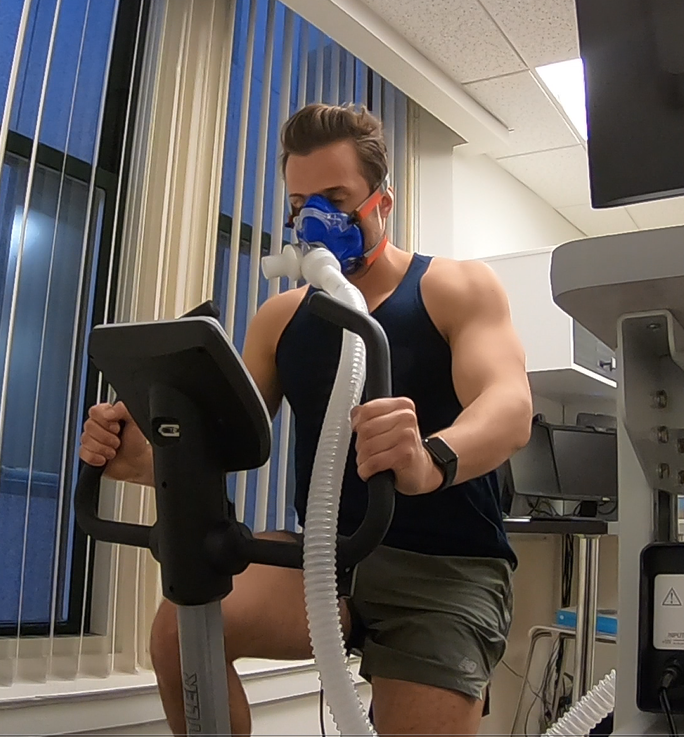
I researched altitude sickness and the physiological effects on the human body. The inner nerd in me would have found it extremely fascinating if it wasn’t so intimidating. It was obvious that I was going to have to take my training and preparation seriously to achieve my goal. This wasn’t a vacation I was going on. This was a difficult and complicated mission to achieve my goal.

I created a short video on the topic of altitude sickness and training in preparation for the climb.

High altitude can have devastating effects on the human body, up to and including death. The climb would be performed without the use of supplemental oxygen*. This meant I had to get my body into peak physical condition and understand altitude well enough to intelligently acclimate and to be able to recognize the more serious signs of altitude sickness.

I wrote a blog on how to prepare for high altitude climbs, such as Chimborazo, which can be found here.

*Both times that I climbed Chimborazo I was unaware of any operators offering supplemental oxygen. While writing this blog I learned of one company that is going to begin to offer clients supplemental oxygen with their services. None-the-less I would recommend proper acclimatization for the best experience.

Welcome to Ecuador

It was December 2018 and the time had come. After 5 months of intense physical training and preparation I was heading to Logan International Airport in Boston to fly to Quito. I would be meeting 2 of my best friends in Quito who I was able to convince to pursue this crazy goal with me. 3 gringos who live at sea level flying to South America to climb to the highest point on Planet Earth… what could go wrong?

The plan was to arrive in Quito and begin acclimatizing in the city 9,000’ above sea level. Next we would go to Cotopaxi National Park and sleep in the refuge at 15,000’, climb to the summit of Cotopaxi at 19,347’ and then rest before sleeping at altitude again at the base of Chimborazo and subsequently taking on the massive mountain.

A successful summit of Cotopaxi boosted morale and confidence in the task ahead.

The awe-inspiring crater at the summit of Cotopaxi in 2018

At breakfast the day of our Chimborazo attempt at a small mountain lodge we met climbers who had attempted the climb the night before and had just come off the mountain. They had run into deep snow at the Castillo ridge and were forced to turn around early. They appeared weary and beaten.

All day we stared at the mountain hoping for no more snow and for sun on the climbing route to melt the loosely packed deep snow, allowing it to freeze into a hard ice sheet for that evening. Cloud cover obscured our view of the summit making it impossible to know what we were getting into that night.

The Cemetery at the base of Chimborazo

As the sun was setting on Chimborazo we hiked to the high altitude Whymper refuge at about 16,000’ to try to get a couple hours of sleep. There is a cemetery between the two mountain refuges with memorials for all the people who have perished on the mountain. A grim reminder of the dangers that can be involved with the goal that lies ahead.

The group arriving at the Carrel Refuge in December 2018

At 12:30 AM we set off for the summit of Chimborazo, following the Direct route (red) that was popular at the time.

2018 Direct Route shown in red. In 2019 I would climb the green route to the summit, which appears on the fringes of this image. The section under El Castillo a has high risk of rockfall. The upper snow covered section has risk of avalanche.

The night was clear and not too cold. We began climbing up the face of the mountain and to our pleasant surprise, we felt great! One foot in front of the other, controlled breathing, this felt fine. Over the radio we here “¡Todos bien!” further reinforcing our confidence for the summit.

About an hour into the climb we reached a section where we had to traverse horizontally across the face of the mountain. The footing was solid; however, there were boulders of all size strewn about the barren landscape. As one of the guides in front of us walked we could hear small rocks breaking loose and tumbling down the icy slope, clicking and clacking all the way down at unknown distances from our party.

Eloy turned back and warned that we must traverse this section quickly as it is very dangerous due common rockfall. This was totally out of our control so I pushed the fear of rocks falling from above to the back of my mind and focused on hurrying across the hazard zone as quickly as possible. Month’s later we would realize how dangerous this section truly was…

After another hour of climbing we came up to an icy wall with a very long vertical drop on the right hand side of it… “La Pared”. It appeared that our route had disappeared. Eloy clipped the rope into a carabiner anchored into the rock overhead and thrust his ice axe into the wall to climb up. The wall was not incredibly large, but with limited climbing experience at the time it was nerve-racking. One mistake here and gravity was going to take over to abruptly end the expedition.

We made it over the wall, but between my nerves and the energy it required to pull myself up the wall at this altitude I needed to take a couple minutes to recover and stop hyperventilating. Once I could stand again we continued up.

About 3.5 hours into the climb my guide, Eloy, suddenly stops with a look of concern on his face. He tests the snow pack by carving out a square with his ice ax and punching the center. Gravity takes over and the square he cut out immediately begins to slide down the slope.

That was it… the slope was unstable. We had to turn back to avoid the high risk of avalanches. Just like that the dream was shot down with the priority of self-preservation.

We hiked down… disheartened at first… then laughing and joking with each other, after all we were in an amazingly beautiful place with good company after having attempted something truly amazing.

With the sun now hitting the face of the mountain we looked up, and sure enough could see multiple sections where the slope gave way and avalanched down the face. Our guides had made the right decision to keep us safe and allow us to return home.

As the sun was rising over Chimborazo I looked back at the mountain from the refuge and promised out loud “I will be back… I will be back.”

A one minute recap video of this failed attempt can be found here.

Enjoying this amazing mountain despite not reaching the summit in 2018
Sunrise while descending Chimborazo on the unsuccessful 2018 attempt

Restless in Boston

I returned home after an amazing first trip to Ecuador. Once I got into work for my first day back I powered up my computer and saw, on my desktop background, the amazing Mount Chimborazo staring back at me. There was no time to relax and regroup, I needed to stay in peak condition so that I could return.

I learned from my tour operator that a climber had perished on Chimborazo the night after our attempt. The climber had reached the summit; however, altitude induced respiratory failure struck during the descent. I kept this information to myself at the time and made a note to train hard and to remember when I return to Chimborazo that the summit is not the end of the effort, it is only the half way point, and not to get complacent.

The training continued daily. My obsession with the goal consumed me. After a couple months I booked a trip back down to Ecuador for May 2019. I planned 12 days, enough time to acclimate in Quito, attempt a summit of the Cayambe volcano (18,997’), trek to El Altar, and finally take on Chimborazo again with all my newly-added red blood cells. This would give me a window of 4 days to pick the best conditions for the Chimborazo climb in hopes of reducing the risk of having my dream thwarted solely by poor climbing conditions.

I invested in my own high quality climbing gear. I intended to reduce the risk of failure by as much as possible with this attempt. I needed to reach that summit. (And it just so happens a shiny ice ax makes a bad ass wall piece when not keeping you stuck to a mountain.)

I signed up for a couple half marathons and a triathlon to ensure I had enough goals at the proper intervals that I would not be able to slack on my training in the time leading up to my return to Chimborazo. I find incremental checkpoints to focus on working towards the greater mission are the best strategy for success as opposed to solely honing in on one massive over-the-moon goal from the beginning.

Final 2019 Gear-Check in Boston

Harrowing News

A month before my flight to Quito I reached out to my tour operator to make sure everything was set for the trip and he had all of the information required.

After a few days I received an apology for a delayed response and the reason for said delay… one of the mountain guides had perished while bringing a client up the Direct Route of Chimborazo.

Once in Ecuador again I would come to find out that it was due to dangerous rockfall section described earlier in the route we had traversed in December.

“Unforgettable” memorial for Telmo Tenemaza in Chimborazo cemetery

The guide who passed was Telmo Tenemaza, who had been kind enough to assist us in December with bringing our bags back to the Chakara Lodge while assisting his own climbing client. These men spend nearly every night together working in the mountain lodges and climbing. It was obvious that losing Telmo was the same as losing a family member.

I should say I thought long and hard about the return at that point, but that would be a bit disingenuous… rock fall, ice fall, avalanches, injuries, and pulmonary edema were all calculated risks in this endeavor. It was a terrible eye-opening tragedy, but reaching the summit of Chimborazo remained my goal.

Rest in peace Telmo, from our brief encounter you were an amazing guide and person.

“I’ll Be Back”

Just as I had promised myself 6 months earlier. I landed in Quito again on May 9 where I met my driver and was transported a private room at El Patio, the hostel my tour operator had set me up with. It was late so I did a test pack of my gear and then made a plan for the next day. I had just gone from sea level to 9,000 feet with my arrival in Quito. I decided to continue to push the elevation higher the following day in an attempt to acclimate as quickly as possible, afterall I was supposed to be taking on the 19,000’ crevasse-covered Cayambe volcano in less than 48 hours.

Acclimatizing on The Summit of Rucu Pinchicha

I found the closest mountain to Quito, Rucu Pinchicha which was a relatively easy climb that could be completed self-guided and was only 20 minutes outside of the city. This climb would get me up to about 15,000’ and help push my altitude threshold a bit higher before Cayambe, all of which was part of the week long acclimatization plan to prepare for my return to Chimborazo. Despite my sea-level gringo lungs I was able to comfortably make it to the summit with a little huffing and puffing.

A short more detailed write-up on Rucu Pinchicha and how to get there can be found here.

Blizzard during descent after a successful summit of Cayambe

Cayambe was a significant challenge but the 18,997’ summit was achieved 48 hours into the Ecuador trip and physically I was feeling amazing. I wrote a more detailed blog on the Cayambe climb here for any interested in learning more that can be found here.

(NOTE: I feel like I must note that it is not wise or common to acclimate as quickly as I did and that it is extremely dangerous for most people to do so! I am fortunate enough to not be drastically impacted by altitude and was in peak physical condition before attempting embarking on this adventure.)

I had been hearing rumors about poor weather conditions on Chimborazo that had halted summit attempts for the last month or so. Heavy wind and snow had been thwarting the summit attempts of all the recent groups, it kept some from even leaving the refuge. At this point all I could do was hope for the best. I still had a few buffer days and a trek to El Altar before my attempt at the main goal of the trip. I tried to remain positive and keep thoughts of Mother Nature crushing my dream at bay. “Focus on what you can control” I thought to myself.

I returned from El Altar on a Tuesday and was originally supposed to attempt Chimborazo after 2 nights of rest in Riobamba. Conditions still were not conducive to a successful summit. In checking the forecast it looked like there was a small possibility of a clear weather window in 3 days time, so I pushed my schedule back one day and had the Carrel refuge booked for Friday evening, May 17.

…Now I had 2 very anxious days and nights to kill in Riobamba.

Continuing to acclimate with a 2-day trek to El Altar

In Plain Site

The day before the climb I decided to spend some time in Chimborazo National Park to gauge my chances of a summit by speaking with the men who run the refuge and see how climbers had been faring. I booked a downhill mountain biking excursion that began at the Chimborazo refuge. Once we arrived at the refuge, I walked past the Chimborazo cemetery again for the first time since December… I was here, I was back. Suddenly it all became real again. The lofty goal I had no business setting a year earlier was directly in front of me, and what an absolutely magnificent site it was that day.

My first time seeing all of Chimborazo clearly, complete with the nearby Sun.

I had never had a clear look at Chimborazo in person… every time I had gazed at the mountain before there was intense cloud cover keeping the upper half hidden, leaving the true beauty and scale of the mountain to my imagination. I had seen incredible photos, and even the outline of the mountain at night in the dark, but not on this day…. On this day, I was looking at the absolutely massive Chimborazo on a sunny, cloudless day. The snow-covered rocky face rose of sharply in front of me seemingly forever to the summit. This was the first time I had ever seen the closest point to outer space with my own two eyes. Emotions began to overflow. The mountain was absolutely magnificent and I felt an incredible sense of purpose and determination in that moment. I imagined myself walking over the final ridge and arriving at the summit. I felt an incredible sensation come over me just by imagining myself up there.

I began to think to myself why is it I came up with this idea in the first place…back to when I was a child and always was fascinated by mountains, or even just the highest place I could see at the time. Every summer driving from New York to Cape Cod I would look at the “mountains” that were really just 500 foot hills along Interstate 90 and wish I could go to the top of them. I’ve always wanted to go to the top of anything I saw really. It’s definitely not something unique to me… I think it’s something most people are drawn to. Why else spend money on observation deck tickets, or pay a premium for apartments on higher floors, or why did people start climbing mountains in the first place? While reflecting on that it feels like this wasn’t just an out of the blue idea, but a desire that’s always been there for me for as long as I can remember. Now here I am standing in front of an awe-inspiring massive mountain, looking at the highest point on Planet Earth. What an incredible journey from staring at the hills on the side of the Interstate in Massachusetts.

It’s interesting how many thoughts, memories, and realizations can come to you when your attention isn’t bogged down by electronic devices and constant sensory stimulation being thrown at you from every angle. There’s a certain clarity and focus that is only possible out there inside of your own head. Personally, this is my favorite part of these experiences. You can find out what your made of physically and mentally. You push your body to the limit and you have nothing but your deep uninterrupted thoughts for hours on end.

I spent the next few hours on the mountain bike riding back into town getting amazing views of Chimborazo from multiple angles. Once back into Riobamba it was time to focus.

The following day would be the day, finally it was time to climb Chimborazo again.

Chimborazo as seen clearly from the bottom of the bike route

The Day

I woke up in the morning in the backyard of my tour operator’s home. He had converted what appeared to be an old animal stable into a 3-room hostel, that actually was quite comfortable.

My guide, Fausto, the same I had for Cayambe, was picking me up at 2:00PM to drive up the mountain for dinner just outside the park entrance and then into the park before it closed at 6:00 PM.

I took the morning to walk to my favorite breakfast spot in Riobamba, a Columbian café with amazing coffee and massive plates of bandeja paisa to begin fueling up for the task ahead. After a huge meal I paid $5 and then had to argue with the chef to persuade him to finally accept my tip.

I returned to my stable-hostel and laid in bed to relax my legs and prepare my pack for the night. I eased my mind by reading books and writing emails until after a few hours I heard a distinct beep beep from Fausto’s mid-90s Chevy Vitara.

Having spent 2 full days together with Fausto he felt like an old friend and I was happy to see him again. We set off towards the imposing Chimborazo towering over Riobamba.

Carrel Refuge

After a hearty meal at the Chakara Inn with other travelers we continued into the entrance of Chimborazo Park just before the gates close for the evening and arrived at the Carrel Refuge at sunset. In December I had stayed at the smaller Whymper refuge, higher up the mountain so I was shocked to see that the Carrel refuge actually had electricity for lighting at nighttime.

There were 6 other climbers in the refuge this night, 4 French climbers and 2 guides. The other climbers were just finishing up a late snack of bread and jam. I gave a quick nod hello and went up to find an unclaimed bunk to call mine for a few hours. Shortly after the rest of the climbers retired to their bunks and the room was filled with the sounds of restless tossing and turning as well as a few not so soothing snores.

The air was frigid and dry so I made sure to continue to hydrate while I lay to replace the water vapor I was exhaling with every breathe. I laid there drifting in and out of short half sleeps that only lasted a few minutes at a time listening to podcasts on my phone. My adrenaline was pinned from the anticipation of the task that lay ahead. I was nervous about beginning the climb without any sleep, but most important in this most was mental toughness and a clear mind so I pushed those anxious thoughts aside and did my best to relax and remain calm. We were taking the long route to the summit this time to avoid the dangerous rockfall section, which meant we would be starting earlier than my last attempt…. it was only a few short hours until the climb.

The Climb

At 11:30 PM the tossing and turning changed to a hustle and bustle as all of the climbers awoke and geared up for the climb. Downstairs in the kitchen a final pre-climb meal of coffee, bread, and jam was waiting to top off our carbohydrate fuel tanks before setting off into the night.

There was little wind on this particularly clear night. The temperature felt about 30 degrees F and there was no precipitation. In other words, the conditions appeared perfect. I tried my best not to get my hopes up too high immediately, there still was the potential for plenty of risks ahead.

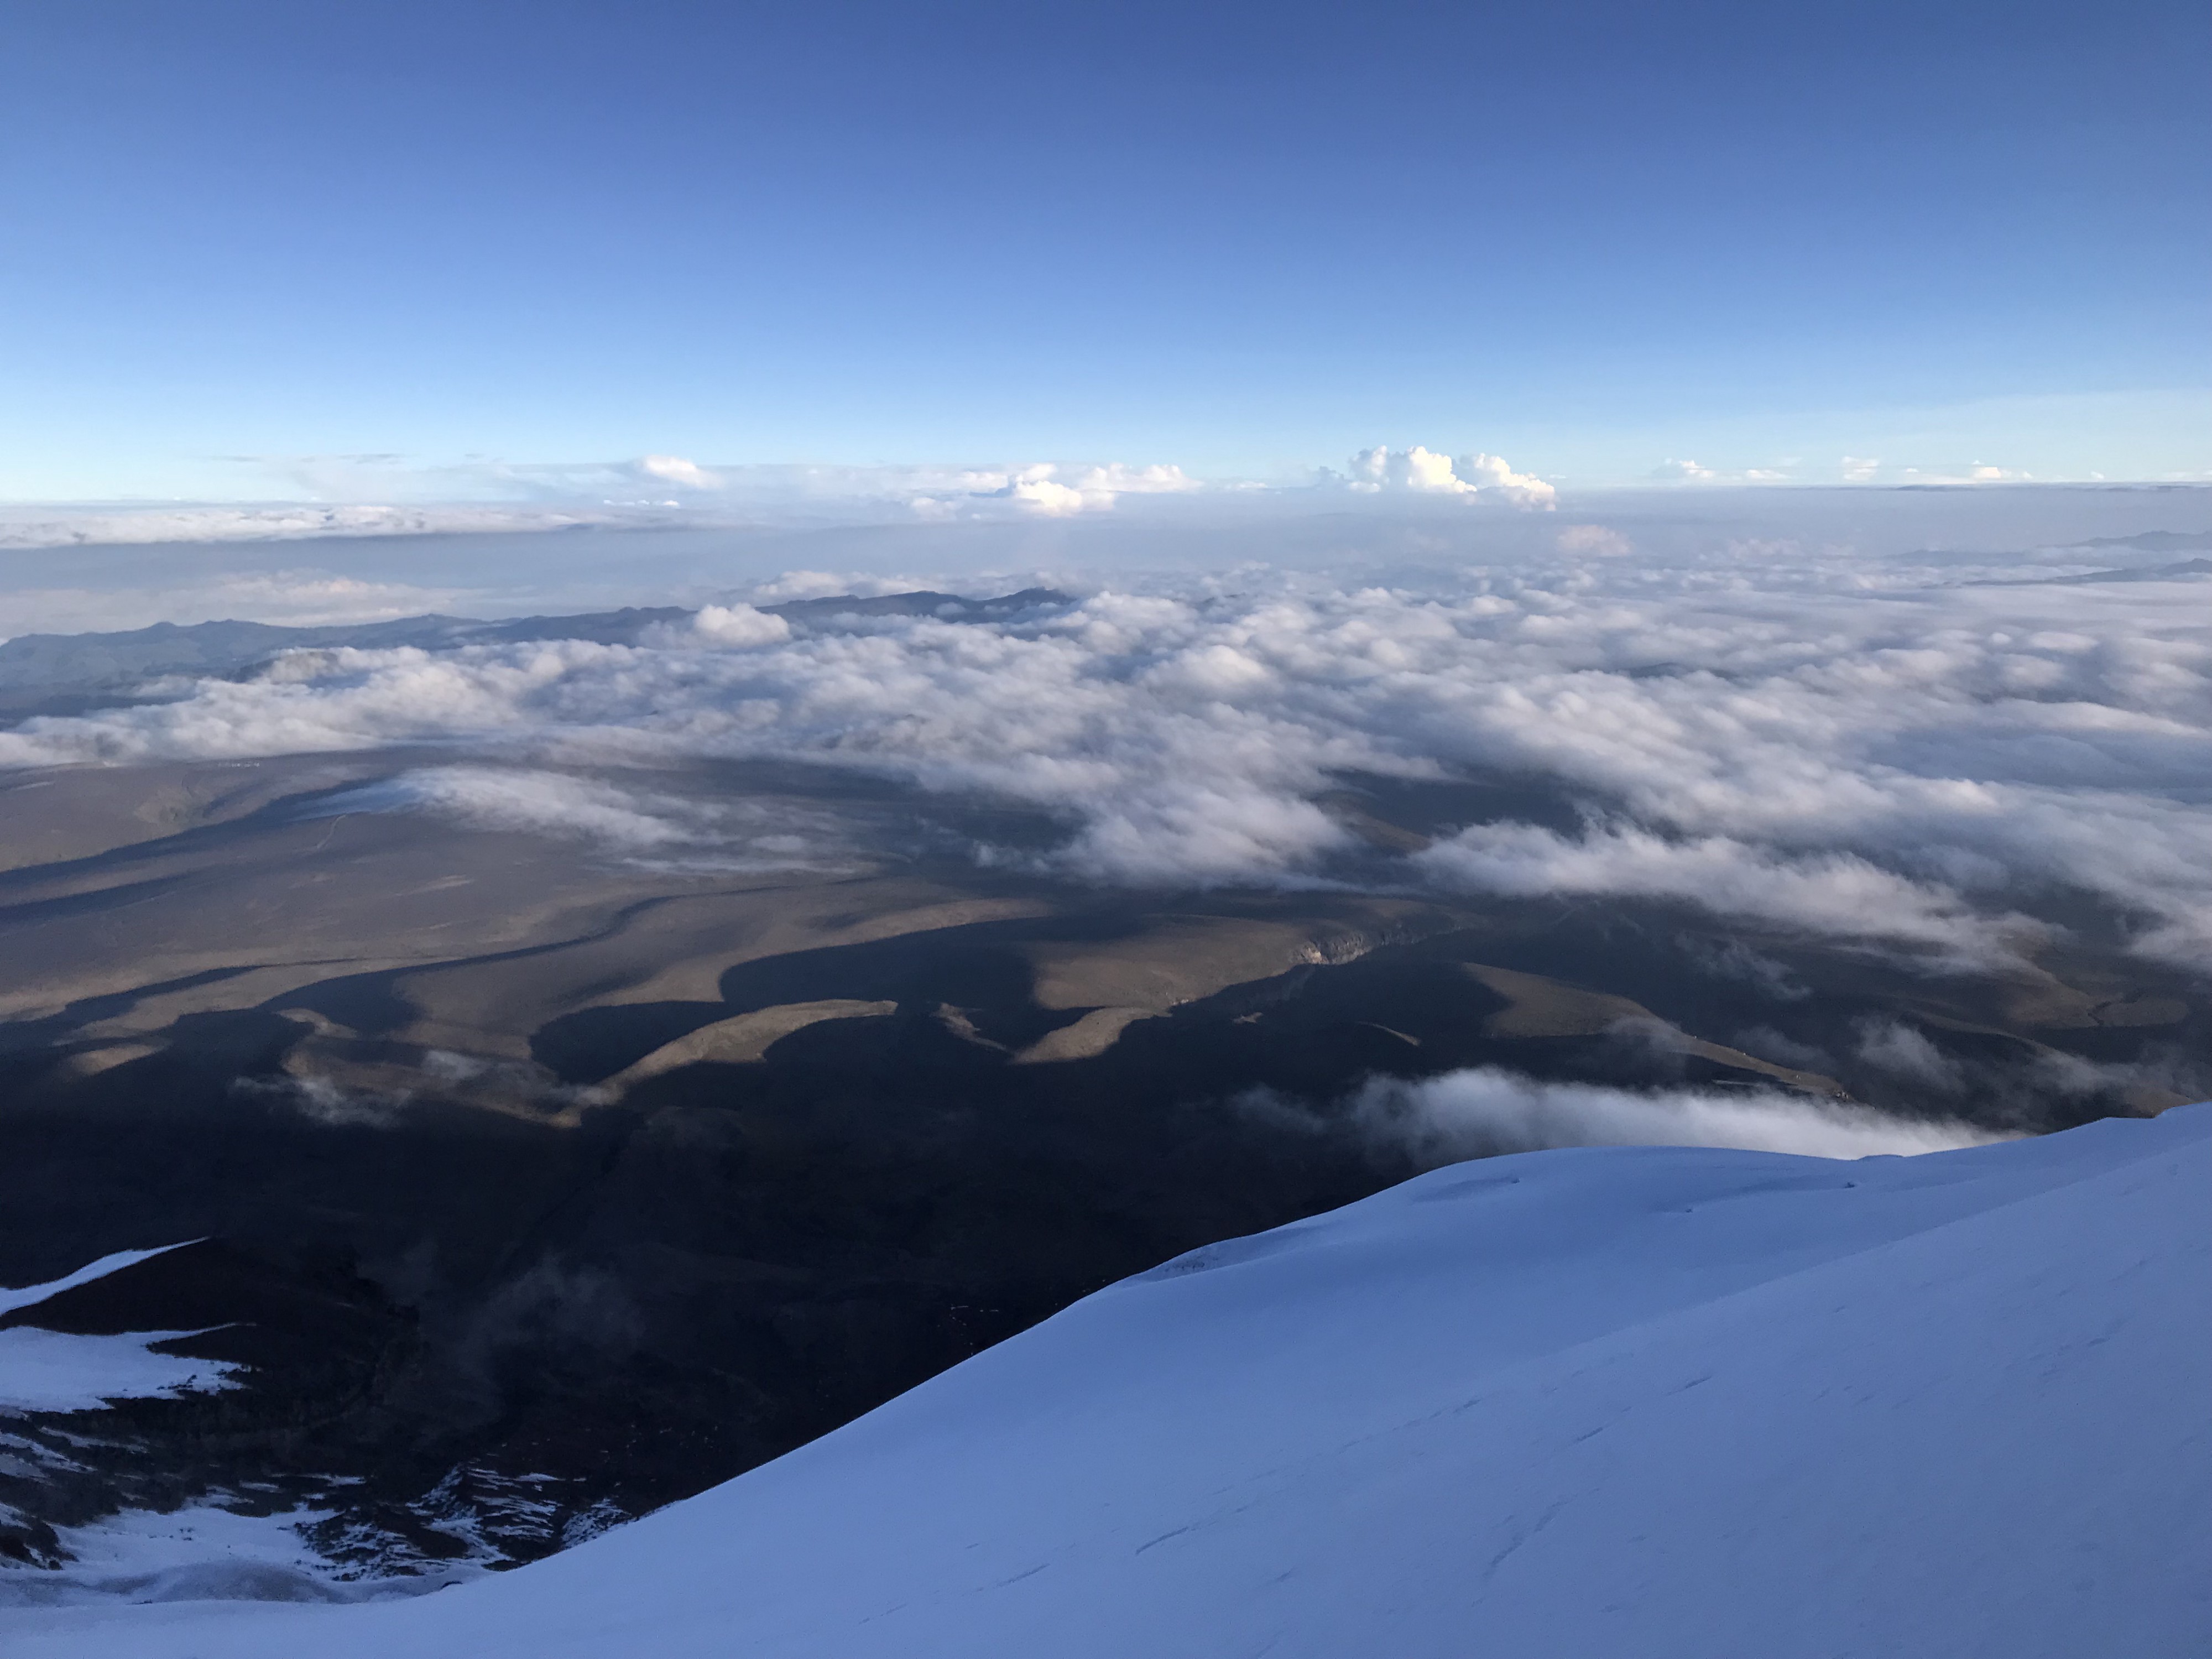
We began working our way higher and higher and soon the only noises to be heard were our exasperated heavy breaths and the crunching of ice under our boots. I remember feeling amazing physically, we were flying up the mountain. Some clouds rolled in at about 18,000 feet just below us and the sight was incredible… Every star in the sky was shining brightly. It’s amazing just how many of them there truly are without light pollution overpowering the glow reaching our planet from millions of light years away. The moon which I was now closer to than ever before was full on this night and it lit up the top of the clouds which now made it feel like we were standing on a snowy island surrounded by an ocean of clouds. This sight alone would have made the entire climb worth it and we were not even 2 hours in.

The clouds and Chimborazo lit up by moonlight during the ascent

Soon we arrived at the Castillo. The next challenge would be climbing under the sheer rock wall along a steep slope of ice. I remember looking to my right and seeing the abruptly steep ice face realizing that if I lost my footing here nothing would stop me from falling thousands of feet.

“Remain calm, you can only do this if you remain calm and focus.”

I remembered a mantra that particularly resonated with me. The goal was to reach the summit, but from the bottom of the mountain or even from half way up that goal seems insurmountable. Break that goal up into tiny goals, and then smaller goals yet and eventually the next step is the goal. You take a step and then tell yourself “one more step” and then you repeat this over and over again, achieving these thousands of tiny goals that bring you closer to the summit. So “one more step” after another Fausto and I continued until we were on a landing suitable for a water and chocolate break.

300 yards down the mountain the headlamps of the other climbing groups illuminated small circles of the mountain in front of them. Something seemed off… Were they… getting further away?… Yes! They were. The other climbers had turned back! Now Fausto and I had Chimborazo all to ourselves. I felt disappointed for them, I knew that feeling of having to turn back, yet I also liked the thought of being the only group on that amazing mountain with nothing but ourselves and the desolate high altitude beauty surrounding us.

At about 19,000 ft I was looking at the final ridgeline to the summit. I was exhausted and the combination of altitude, physical exertion, and sleep deprivation had my head absolutely pounding like something was trying to break its way out of my forehead. It seemed like the summit was close yet when I asked Fausto how far we were he told me we had 3 hours to go. I soon found out why…

Above 19,000 feet the altitude seemed to become exponentially more difficult, the snow was deeper, the air was colder, and the wind blew harder. The “close” summit had been my brain playing tricks on me and we had a massive ridge to work up to still.

Now on the high ridge we were fully exposed and the temperature dropped precipitously. My fingers and toes went numb and any time I stopped working up the ridge to frantically catch my breath my entire body began to shiver. It was the most uncomfortable I had ever been in my life, but I remembered this is why I came here… I came to push the limits of my body and my mind. If it was easy the summit wouldn’t be rewarding. If it was easy I wouldn’t grow. I blocked all the physical discomfort out of my mind and focused on “one more step”.

“What are you made of? It’s time to find out what you’re made of”… I said out loud to myself as I let my mind override my exhausted body and force it to continue to push upwards.

I climbed and climbed like a man possessed. I could finally feel my goal in reach… all this time… all this training. I kept fighting my weary body with every step as my body got colder and colder. Until I noticed Fausto had stopped moving.

I had been so focused on my feet and my axe and taking one more step that I hadn’t looked up in quite some time. When I did I saw nothing but air and the night sky above me.

The Highest Man on Earth

“We made it!”

“We made it?? …… We made it!” I said through heavy breaths as the wind blasted the already raw skin on my face. We had climbed faster than planned and arrived at the summit about 30 minutes before sunrise. Small ice penitentes surrounded us on all sides like we were in some kind of ice forest. A realization struck… I was one of the few people on the planet that would be fortunate enough to see this amazing place and because of that I made sure not to take it for granted. This was magical.

I asked Fausto if we could wait for the sunrise to get the photo at the summit I had dreamed about for a year now, but unfortunately neither of our feet or hands were doing well and I was shivering uncontrollably at this point. To stand still on the summit waiting for the sunrise would be recklessly adding a serious risk. Fausto snapped a few photos of me using the flash and I savored the moment for a few minutes before taking my first step back to descend.

As I started walking back immense excitement and euphoria came over me. I had done it. For those few minutes this sea-level gringo was the highest man on Earth. Despite the growing discomfort, each step I took my smile grew wider.

Freezing and Exhausted on the Summit

Daybreak of the Nearby Sun

A half hour later we were slowly making our way down the long ridgeline when the sky began to light up with an amazing glow along the horizon. This is where the best photos and videos of the climb were captured. I was still riding an incredible high from having conquered my lofty goal. The skies were clear allowing me to see the Pacific Ocean hundreds of miles away and many of Ecuador’s other stratovolcanoes. The sharply defined shadow of Chimborazo enveloped the entire Riobamba valley below. I wished I could sit right there for hours and take it all in. The word awesome gets tossed around a lot, but this…. this was the true definition of awesome.

Sunrise after reaching the summit of Chimborazo
The shadow of the mighty Chimborazo over Riobamba
Still high above the clouds looking towards the Pacific Ocean during the descent

The Descent

Looking past me up the main ridge of Chimborazo during the descent (~20,000′)

Fausto and I continued to work our way down the snowy ridgeline one careful step after another. With every heel plant of my crampons the thin ice layer on top of the snow would crunch and move below me, forcing my body to expend more energy to stay upright. Several times my beaten legs gave out and my knee dropped into the snow with a similar crunch.

The cumulative effect of the time at altitude and the amount of time without sleep was beginning to hit me and the euphoria of the moment was replaced with a need to get down.

First was an excruciating headache. I felt as if something was expanding inside of my head and it was about to burst open at any moment. As if the throbbing pulse I felt would be visible to anyone looking at me. I paused to drink more fluids, take ibuprofen, and down another 125mg of Acetazolamide, but soon found that none of this gave me any relief. Rest would be the only savior, and for rest I needed to complete the descent. Waiting for someone to come help was not an option, the only way down was on my own two feet.

Descending the vertical wall over the Castillo was a test of nerves. With the toe of my crampons jammed into the ice covered rocks and the pick of my axe wedged in above, I looked over my shoulder could see all the way to Condor Concha at base camp. After a few minutes of careful holds and audible self-assurance I was off the wall and exhaled a sigh of relief.

Looking over my shoulder while descending the wall. That’s a long way down!

For the descent Fausto elected the Direct Route that we had climbed up in the failed attempt in December. I was apprehensive of the dangers of rockfall with this route, but it also guaranteed the quickest descent to lower altitude.

About an hour later we reached the end of the glacier and we took a break to remove our crampons before descending the final steps to past Condor Concha and to the base camp.

Despite being totally exhausted, I was so high on life that sleep wasn’t an option. I had done it. I had achieved the goal I had no business setting in the first place. On that day I was the highest person on the planet.

Exhausted, beaten, but alive after the main descent
The plaque at the entrance of the Carrel Refuge

Thank you so much for reading. Please check out the video of the successful summit climb HERE!

Training for Chimborazo and Extreme Altitude Climbs

Gearing up for Chimborazo – December, 2018

So you plan to take on your first extreme altitude climb? That’s great! Climbing Chimborazo or any other high altitude peak is no simple trek. It requires supreme endurance, mental focus, strength, and conditioning to achieve. Whether you are a seasoned climber preparing to return to a mountain or if you are a novice looking to challenge yourself, I believe the training tips in this blog will get you in a physical state that will give you the best possible chances of successfully achieving the summit and having “fun” while you do it.

I wrote “fun” like this because this is a totally different idea of fun than the mainstream definition. This is masochistic fun. This is the fun you find in challenging yourself and pushing yourself to new limits. This is the fun of reaching a goal after mental and physical exhaustion and busting through your mental limits. If this is your idea of “fun” I think you will also find my training plan and tips to also be quite enjoyable.

This blog will breakdown the categories of fitness that I believe you should focus on and discuss some training principles for each. At the end of the discussion I will provide an actual sample workout to try yourself. For a complete training program send me a direct message and I will work with you to put a plan together.

When I climbed in December I felt great. In this most recent round of climbing in May I had 6 more months to continue my preparation and I could not have felt better physically, which I attribute the training techniques highlighted in the blog.

Can you Physically Prepare for Altitude?

The short answer… No. Altitude sickness (a.k.a. Acute Mountain Sickness or AMS) is a neurological condition that is primarily determined by genetics. There is no way to train to avoid the symptoms of AMS. Proper acclimatization is your best defense against the nuisance and/or critically dangerous symptoms of AMS.

You can however increase your chances of reaching the summit through proper fitness training leading up to the climb. More physically fit individuals also generally acclimate a bit more efficiently.

For more information about the physiological effects of altitude on the human body check out my video on the subject here: Chimborazo Background and Altitude Sickness

What Areas Should You Focus on?

  • Cardio vascular fitness and VO2 max
  • Leg strength, stability, and endurance
  • Core strength, stability, and endurance
  • Mental toughness

Cardiovascular Fitness and VO2 Max

My VO2 Max test on a stationary bike at Cenegenics Boston

Before the last climbs I put most of my focus on cardiovascular fitness and improving my VO2 max. You may be asking, “Isn’t that redundant since VO2 max a measure of cardiovascular fitness?” Well yes and no, VO2 max improvement comes from a very specific type of training with defined efforts, timing, and heart rate zones. General cardiovascular fitness can be improved through a variety of training methods without increasing peak VO2 max.

VO2 max is a measure of your maximal oxygen uptake and it is measured in mL of oxygen consumed per minute, per kilogram of body weight. (mL/kg/min).

So can increasing your VO2 max reduce the effects of altitude sickness? Well… no not exactly, but increasing your VO2 max will ensure that you are able to use what little oxygen is in the air at altitude as efficiently as possible to produce the energy required to make it to the summit. This is why I’ve highlighted VO2 max as a critical focus of training.

Fitness beginners can see an initial increase in VO2 max from extended steady state cardio such as long bike rides or runs, but at some point high intensity interval training (HIIT) will be the best method of improving your maximal oxygen uptake.

To improve VO2 max you need to exercise your system at your aerobic ceiling. The HIIT workout posted below is a great example for busting your VO2 max plateau. Other ways of doing this are through interval sprints such a 1 to 2 minutes at 100% effort and 30-60 seconds about a 70% effort. This can be done on a rower, treadmill, air assault bike, or even outdoors. This should work you back and forth between your aerobic threshold zone and your maximum effort. This type of extreme intensity training should only be done for 10-15 minutes to see the benefits.

Your maximum effort will likely be limited by your maximum heart rate. That maximum heart rate will determine what heart rate the other training zone percentages correlate to. Heart rate training gets a bit more involved and complicated so I’ll save the in depth discussion for a follow up blog.

Check out this link for a video I made about VO2 max and training specifically for these high altitude climbs and where I put myself through a VO2 max test: VO2 Max and Training for Chimborazo

Leg Strength, Stability, and Endurance

Weighted Split Lunge Jumps

The “why” for leg strength and endurance is pretty obvious. Those get-away sticks are going to be carrying the brunt of the load getting you up the mountain. “How” you train and improve your leg strength, stability, and endurance will be critical in seeing the benefits you will need to have the best chance of reaching the summit.

Not only will you be working for 10 to 12+ hours to get your body up and down the mountain, but you’ll also have the weight of all of your gear and provisions on your back the entire way. Because of this its critical that you are in peak physical condition for long and slow endurance feats in addition to exemplary motor fitness (power, flexibility, balance, and agility.) Being able to run a marathon won’t mean your in correct condition to climb; just as being able to squat 400 pounds will not. You will need to be a true hybrid athlete possessing a balance of both worlds to have the best chance of taking in those summit views.

I’ve highlighted a wide variety of leg training methods. This is a calculated strategy. When climbing the mountain you are going up, down, and sideways with a variety of foot and leg positions required at different times. This means that every muscle in your legs will be utilized at some point. Use diverse training methods to make sure you don’t have a weak point and all your stabilizing muscles are ready to go!

Leg-Focused Circuit Training

When preparing to climb I try to design my HIIT and circuit training routines to be leg focused and hit them once or twice a week. This typically involves a lot of split lunge jumps, step ups, sled pushes, squats, and deadlift variations. These should give you the strength to power up the mountain while the single leg isolation variations will improve your stability and agility. The leg-focused and core-focused workouts are what I have highlighted below.

I typically post these HIIT/circuit training workouts every Wednesday on my Instagram story.

Running/Hiking

Long runs and hikes will improve your endurance while simultaneously improving your overall cardio health. Long steady state endurance training also will help your small supporting muscle groups to prevent overuse injuries and joint/tendon inflammation. When training for a climb I typically try to get a few 5-6 mile runs in during the week with a 10+ mile run on the weekend.

If you start to experience any tendon or joint inflammation it’s critical to immediately back off a bit to recover before resuming training with a more gradual ramp up.

If you are going to train by hiking I would recommend loading up your daypack and throwing it on for some added weight.

Stairmaster

If you don’t have nearby mountains to train on the stairmaster is the next best thing. I usually will do 20 minutes at a time with a weighted vest on or a full pack on my back for some climbing endurance gains. You don’t have either and want to start training anyways? Throw a sandbag over your shoulders and start marching up those stairs. Be ready for some serious sweat!

Cycling

In the last climb I found cycling to be my secret training weapon. Cycling will work the same muscles you will need to climb without all the impact on your joints. I usually cycle to and from work anyways which is why I refer to it as my “secret” weapon, because I didn’t even realize how much it benefited my leg strength and endurance until I actually got on the mountain last time. Adding in a few 10-20 mile rides a week will pay you dividends on climbing day.

Core strength, stability, and endurance

Your core strength, stability, and endurance will be just as important as your leg conditioning. Your legs are going to power you up the mountain, but your core will keep you balanced and will allow you to carry your pack and gear without fatigue or injury. Your core also will play a key role in making a correction if you do briefly lose your balance to avoid catastrophe.

Your core should be somewhat engaged in just about anything you do anyways. I usually target it specifically at least every other day of training and will adjust focus on upper/lower ab strength, oblique strength, lower back, and core stability.

Upper/Lower Abdominal Strength and Endurance

I specifically like to target my abs with decline sit-ups, hanging leg raise variations, and V-Ups.

To focus on strength add some weight with a plate or medicine ball and utilize 30-45 second rest periods between sets. Do a full 3-4 sets of one exercise before moving on to the next.

To focus on endurance rotate through a circuit of 3 to 4 exercises with either a rep target for time, only resting when absolutely needed or setting a timer for 5-10 minutes and cycling through the circuit for AMRAP (As Many Reps As Possible) without rest.

Oblique Strength and Endurance

Sometimes obliques will be worked into the circuit above with hanging leg raise circles, hanging bicycles, and knee to elbow decline crunches. However; in order to up my training volume without overtraining, I will often target obliques separately.

To focus on oblique strength utilize standing or kneeling cable axe chops, weighted side bends, or an oblique rotation machine with 30-45 second rest periods between sets. Once again utilize 30-45 second rest periods before moving on to the next set.

To focus on oblique endurance I recommend medicine ball twists, hanging oblique leg raises, weighted side bends, and hip touch planks. As with ab endurance, once again utilize a rep target for time or an AMRAP approach.

Lower Back

This blog is focused on training specifically for mountaineering. I still utilize a 4 day lifting split in which lower back is targeted on “back day”. If this is not how you train then I recommend utilizing barbell deadlifts. Rather than going to max strength try to get 15-20 reps with proper form and keep rest periods to 60 seconds. This will give you a combination of strength and endurance for the climb.

I also work lower back training into the HIIT and circuit training routines that I design, so if these workouts are utilized your back should be in good shape to bear the weight of your pack up during the climb.

Core Stability

This is probably the most important aspect of core training with respect to climbing. Superior core stability will help keep you balanced and will allow you to forget all about that pack on your back.

Great exercises for core stability include planks, side planks, butterfly kicks, and suitcase carries. One of my personal favorites is to set a timer for 5 minutes at the end of a lifting workout and alternate as absolutely needed between planks and butterfly kicks for the entire time.

Core stability training can be added to your rotation a bit more than the strength and endurance focused training so throw some planks in at the end of multiple workouts each week, or even hold a plank during your “rest” period between lifting sets.

Rock Climbing

Rock climbing could be a section all to itself, but I want to keep this simple, and among other things, rock climbing is a great was to get in some functional core training while developing skills you’ll need on the mountain.

Depending on the mountain there may be some basic rock climbing and ice climbing involved. (This blog is not targeting the expert rock or ice climber.) So as a bonus, I personally found the basic rock climbing knowledge I had from the gym helped me immensely in knowing what hand holds to use, how to properly distribute my weight, and about keep my hips close to the wall.

Mental Toughness

Above all else you will need mental toughness. I’m going to repeat that a little bit louder… ABOVE ALL ELSE YOU WILL NEED MENTAL TOUGHNESS.

I’m a big fan of David Goggins, (Navy SEAL, Army Ranger, pull-up world record holder, and elite ultramarathon runner among countless other things on his long resume) and believe in his 40% rule. The rule simply states that when your mind is telling you you’re done your body is really only 40% done. Mental toughness will allow you to push past that 40% and realize things you never thought were possible.

You need to get comfortable with being uncomfortable and focus on the immediate task at hand. The immediate task at hand is not reaching the summit of the mountain. It’s taking the next step, and then the next task is taking the next step.

I personally “train” mental toughness as related to fitness by running on a treadmill at my best mile pace and then when that mile hits and my mind tells me I have nothing left to give I continue to push for another minute without reducing speed. It hurts, it’s uncomfortable, it’s exhausting, but it shows you that you actually have a lot more in the tank than you thought possible.

Everyone has different exact methods that will work for them based on personality and intrinsic motivators so I won’t go into detail here. The key takeaway is you need to be tough, determined, and focused.

Products I Used to Prepare

When I started training for Chimborazo I significantly increased the intensity and frequency of my workouts. In order to do this I had to pay close attention to my dietary and nutrition needs to ensure I was recovering properly and operating as efficiently as possible. After closely analyzing my own diet and deficiencies I was able to select a range of products to help me bust through plateaus and achieve my goals, and for this I turned to the company 1stPhorm. Having tried numerous supplement products and companies over the last 10 years, the significant difference in quality and results from 1stPhorm was immediately apparent, particularly in daily energy levels, recovery, and immune response.

I believe in the company and the products so much that I decided to become involved. Because of this I am offering anyone who reads this blog my free shipping discount on the products I highlight below. In this blog I am only highlighting what I believe was specifically applicable to the climb preparation. Use THIS LINK to have the discount applied or just to browse the general website. Click on the headings below to go directly to that product page. I encourage anyone to message me directly with any questions on the products as well.

Post Workout Recovery Stack

The post workout stack I use is comprised of two products, Phormula-1 and Ignition.

Phormula-1 is an ultra-high quality rapid assimilation whey protein isolate. It is the most bio-available protein source available to allow for the best quality and rate of recovery.

Ignition is an incredibly fast absorbing carbohydrate that when paired with the Phormula-1 will allow for the best possible recovery through glycogen recovery and ensuring the protein goes towards rebuilding muscle and not replenishing short term energy stores.

I personally found myself busting through my strength and power plateaus and recovering about a full day quicker when I made the switch to these products for proper post workout recovery.

Microfactor

Proper micronutrition is critical for keeping your body operating as efficiently as possible, energy levels high, and your immune system primed. Microfactor is a daily micronutrient pack including a complete multivitamin, antioxidant, fruits and veggies capsule, essential fatty acids, probiotics, and CoQ10.

I personally use it every day and when travelling to the mountains will put a pack in my suitcase for everyday that I’ll be gone. Microfactor has kept me healthy despite severe physical stress, sleep deprivation, and the occasional unsanitary travel conditions. It also can be difficult to find nutrient rich foods while travelling, so the microfactor ensures you’re still getting all the vitamins and minerals your body needs even if the wholefoods diet in a particular location is lacking.

Opti-greens 50

Optigreens contain 50 non-GMO ingredients with 100% organic grasses, superfoods, phytonutrients, digestive enzymes, and probiotics.

This product helps optimize digestion to help you utilize you macro-nutrients as energy instead of storing them as fat, keeps your sustained energy levels high, improves immune response, reduces inflammation, improve mood and can have a plethora of other health benefits.

This is another product I take daily and is probably my absolute favorite product of them all. I made sure to bring one serving for every day I’m travelling in addition to the Microfactor to keep my body primed on the go.

Everything is backed by a 110% Money back guarantee so give the products a shot and see some awesome results for yourself!

A Note About Overtraining

Everybody will be at different levels of fitness and more specifically will be at different levels for each type of fitness. You need to know your body to know if any pain you’re feeling is simple muscle soreness or overtraining inflammation that can lead to injury. My personal training program is pretty intense and likely will be overtraining for most weekend warrior fitness enthusiasts, but the principles remain the same. Adjust your intensity ramp up as needed to ensure you don’t injure yourself, but don’t use this as an excuse to get lazy either, because the only person you’ll be tricking is yourself come climbing day.

Sample Climbing Prep Circuit Workout

I have a ton of custom circuit workouts that I design and test myself each week. For more workouts or a complete training plan please message me directly.

Give this sample workout below a shot and see what you think!

Some Closing Notes

I mentioned in my opening that more physically fit individuals can have an easier time acclimating to altitude. I can attest to this in my most recent trip to Ecuador as I was much more fit than 6 months ago and had noticeably less symptoms of altitude sickness despite going from sea level to 16,000 feet within about 12 hours. The following day I brought it up to 19,000 ft and despite the obvious difficulty breathing had no other symptoms of AMS that I’ve experienced in the past (headache, loss of appetite, lethargy).

Despite living at sea level I also was one of the fastest and best prepared climbers making my way to the summit.

To to put it short and simple, the kind of training I’ve highlighted in this blog works.

Photo from the successful Chimborazo summit climb 5/17/2019

Chimborazo Packing List and Tips

It was 6 months ago that i first traveled to Ecuador to climb Chimborazo and Cotopaxi. There was one thing I discovered immediately when planning for the trip and that frustrating discovery was that there was very little input on exactly what to bring for this type of an adventure. Furthermore, the information that was out there on what to bring was often contradictory.

I am preparing to return to Ecuador in 3 weeks to climb Chimborazo again, and also to tackle Cayambe and El Altar. I decided while making my personal packing list to create a resource for others looking to climb Ecuador’s volcanoes to take some stress out of the process so you can focus on the mountain. This blog is going to go over the essentials that you absolutely NEED to bring with you, some suggestions on what “niceties” to bring, and what of those items may be able to be purchased or rented in Ecuador.

This list will seem obvious to seasoned alpinists, but I believe it will be a valuable resource for novice climbers and adventurers.

First, it is worth noting that although the cost of living is much lower in Ecuador, the import taxes are excessively high. This means the same pair of boots or jacket may cost twice as much in Ecuador as they do in the United States! This makes forgetting a crucial item all the more painstaking. This is why careful planning should be done when packing to give you the best chance of reaching the summit.

Also please check out my YouTube channel for some background info and prep, training tips, and footage of the actual climbs!

YouTube Channel

Note: I am not receiving any payment from any brands for this. I am listing titles for the photos I use and mentioning the gear I personally used that I have first-hand experience with.

The Essentials

Footwear

  • Mountaineering Boots
  • Hiking Socks
  • Gaitors
  • Crampons

Mountaineering Boots:

Scarpa Mont Blanc Pro GTX

In my opinion, proper footwear is going to be the most important factor with your comfort level on the mountain. Most adventure tour operators will rent out boots; however, they are typically hand-me-downs at the end of their life and if you get a proper fit it is by pure luck. Bottom line, if you’re going to invest in climbing mountains then you should invest in a pair of mountaineering boots that fit you properly.

I personally bought the Scarpa Mont Blanc Pro GTX boots and they were perfect for the job, so they’ll be making the trip back to Ecuador with me next month.

Make sure to get a size that isn’t so big that your heel loosely rubs, but not so small that your toes are hitting the front of the boot. Also keep in mind that your feet will likely swell during the climb.

TIP: If buying new boots, get a pair 6-8 weeks before you leave for you trip and wear them as often as possible anywhere that you can. Mountaineering boots take a long time to break in, but it’s well worth it to do this before the climb to make sure they are as comfortable as possible when it matters most. It also takes some getting used to walking in the boots because of how much stiffer they are than other shoes and boots.

Hiking Socks:

Darn Tough Hunter OTC

2 Pairs of wool or synthetic heavyweight hiking socks. I used the Darn Tough Hunter OTC with extra cushion and for the most part my feet remained surprisingly warm and comfortable.

I recommend packing at least 3 pairs since if a pair somehow becomes wet they will be completely useless to you.

Alpine Gaitors:

REI Co-op full length Alpine Gaitors

Full length, waterproof alpine gaitors that will fit over your boots. These can typically be rented from the operator, which is what I did in December without any issues. However, if you intend to continue climbing in the future they are a relative cheap item, so I invested in my own pair this time around.

Crampons:

Black Diamond Sabretooth Pro

Crampons are absolutely critical once you hit a certain elevation and the route turns into a glacier climb. Crampons can absolutely be rented through most tour operators, and like most people I rented when I climbed last year. However; crampons are essentially safety equipment with the potential to be lifesaving, so for this trip I invested in a pair of my own to ensure I’m familiar with how they go onto my specific boots and am sure they are as sharp as they need to be.

Climbing Gear

  • Ice Axe
  • Climbing Harness
  • Trekking Poles
  • Climbing Rope
  • Helmet
  • Carabiners (Locking)

Ice Axe:

Black Diamond Raven Pro Ice Axe

Once you hit the glacier part of the climb an ice axe is going to become your best friend. Your ice axe also will be critical if you fall and need to perform an ice axe self arrest. (If you don’t know it already be sure to request that your guide show you this technique!) Axes are typically rented through your tour operator and will generally be adequate. I rented last year; however for this trip I wanted to make sure I got an axe sized for my exact height. Not to mention it makes a great wall piece to put with your photos after the climb!

An ice axe leash isn’t necessarily critical for these climbs. If you do bring your own axe I would recommend investing in tip and spike protectors to avoid shredding your other gear in your bag (some people make their own out of cardboard or tennis balls but the packaged protectors are quite cheap and more durable). Which brings me to another point… ice axes are required to go into your checked baggage. TSA won’t be a fan of seeing one of these in the security line!

Climbing Harness:

Petzl Tour Harness

Your climbing harness must comfortably fit over all your clothing with adjustable leg and waist straps. This is critical safety equipment and will be used to tie off to climbing partners and/or your guide during the climb. If you are inexperienced with harnesses I would recommend renting this from your operator.

Trekking Poles:

Black Diamond Alpine Carbon Cork

Collapsible, adjustable trekking poles with snow baskets are a must. You will need both up until reaching the glacier and then you will be using one with the ice axe for the remainder of the climb. These are tough to find in Ecuador and any rental options may be in rough shape. I would highly recommend purchasing your own trekking poles. Suitable options begin at just over $20.00 and can go all the way up to $200+ for the lightest possible construction and advanced features.

Climbing Rope

Black Diamond 7.9mm Dry

Climbing rope will be required to tie off to one another and possibly even to clip into a carabiner on a more technical section of the climb. Unless you are an expert, let your guide/operator handle the rope and knots. However, the rope still could end up saving YOUR life, so carefully inspect the rope for damage and fraying and request a different rope if you find any.

TIP: It is easy to step on the rope by accident while climbing with your crampons which could damage the rope or trip you. Don’t get complacent and always be aware of where the rope is and how much slack there is.

Hands

  • Waterproof Insulated Alpine Gloves
  • Lightweight Lining Gloves

Waterproof Insulated Alpine Gloves

Black Diamond Guide

Keeping your hands warm could make or break your climbing experience. Painful, numb fingers can take away from the awe inspiring views you’ll be experiencing. A pair of heavy duty, insulated, waterproof gloves are an absolute must. I elected to go with the Black Diamond Guide gloves in order to give up a little bit of warmth that could be had with mittens in exchange for added dexterity to help with going into my backpack for snacks and to be able to quickly access my GoPro.

My hands were quite comfortable for the entire duration of the climb so these will be making the trip with me back to Ecuador for round two.

Lightweight Lining Gloves

New Balance Running Gloves

Most people will use a lightweight merino wool liner glove. My heavyweight glove already had a liner so I brought these gloves along in case a needed extra warmth or for when the alpine gloves were overkill. I’m employed by New Balance so I am already partial to their technical gear and decided to use it whenever possible and practical on this climb.

These gloves were perfect for this since they are thin and breathable enough to go on under your alpine gloves. They also allow you to utilize touch screens and therefore still have some protection from the elements while operating your smart phone or watch. They also are thin enough to allow you to keep them on while putting on your crampons.

Head

  • Climbing Helmet
  • Balaclava
  • Headlamp
  • Sunglasses

Climbing Helmet

Black Diamond Vapor

You will need a hard helmet for protection against falling rocks, ice, and debris. Most tour operators will provide these for you. However, if you are going to be using helmet mounts for your camera you may want to get your own, or at least have the operator give you approval before you arrive.

Balaclava

Seirus Polartec Ultra Clava

I found the Seirus balaclava fit well under the helmet and was extremely warm during the climb (almost too warm). Many people opt to go for a synthetic hat and hoo-rag combination, but personally I would recommend using the balaclava. It can easily be worn 3 different ways (scarf, scarf/hat, full balaclava) depending on what the conditions call for.

Headlamp

Black Diamond Spot

You will be climbing in the dark and therefore will need a high quality headlamp to shine the path for you. This also will be your only way of navigating the base lodges after dark and of prepping your gear to leave the base lodge as they do not have electricity.

Key features are LED, water resistance, and non-rechargeable. Why non-rechargeable? Because this way you can have spare batteries on you and quickly swap them out if the light dies on you. I can tell you from firsthand experience this can be a frequent occurrence, especially with the cold temperatures.

I used the Black Diamond Spot, and it was totally suitable for the job and therefore will be returning with me. It is a bit quirky to use and there are valid complaints about a “yellow spot” in certain modes so there may be better options out there.

Some operators will provide these, but I prefer to have my own since a good headlamp comes in useful quite often, on and off the mountain.

Polarized Sunglasses

Carrera 5046/S

If all goes as planned you will be reaching the summit just before sunrise. After snapping a few quick photos you will be getting off the mountain as soon as possible before the warmth from the sun makes the route treacherous and “the mountain wakes up”.

Once the sun comes up, it is POWERFUL. Aside from making you shed layers and sweat, the extremely high UV level due to the altitude and the reflection off the ice and snow can impact your eyes or even result in snow-blindness. You will need polarized eyewear to protect yourself.

I used Carrera driving glasses for my first trip, which is why I used a Carrera model photo for this section, but I will be investing in glacier goggles or bringing my ski goggles with me with a high-contrast polarized lens for round 2.

Clothing and Layering

  • Waterproof/windproof hardshell jacket
  • Insulated Down Jacket
  • Top Mid-Layer
  • Top Base-layer
  • Wind/Water Resistant Softshell Pants
  • Bottom Base-Layer
  • Underwear
Burton AK 3L GORE-TEX Freebird

There are plenty of options for a good hard-shell waterproof jacket from the typical outdoors and mountaineering brands. As a snowboarder I already owned a Burton AK Jacket and realized that it’s technical specifications were more than suited for the job. It provided all the protection from the elements I needed, while the over-sized hood allowed it to be used with the climbing helmet and the numerous large pockets were perfect for gear, snacks, and my camera.

Insulated Down Jacket

New Balance 800D Down Jacket

The outer shell will protect you from the precipitation and wind, but you will need an insulating layer for warmth. For weight to warmth ratio, not to mention incredible packability when paired with a stuff sack, a down jacket can’t be beat.

New Balance’s heat gear is the real deal. For the climb I used the 800D rating down jacket as my insulating layer and was incredibly comfortable the entire time. When sleeping at the base lodge I was able to use this just this jacket and forgo zipping up my sleeping bag to stay warm. It also served as my daily jacket when in town and at lower elevations.

Tip: Throw a couple patches or some duct tape in your bag in case you rip a hole in your down jacket and need a quick on-the-fly repair.

Top Mid-Layer

New Balance NB Heat 1/4 Zip

A mid layer should be lightweight, thin, breathable, and warm. I used my New Balance NB Heat 1/4 zip because I had experience using it running and snowboarding in the winter and knew how warm of a technical fabric it was despite being so thin.

An added bonus was the zippered chest pocket which I used to stow my extra GoPro battery. By keeping the battery stored against my body, my body heat prevented the cold from sapping the battery’s juice before I needed it.

Top Base-Layer

New Balance Trinamic Long Sleeve

For the base layer a long sleeve merino wool or a technical fabric should be used.

For my base layer I used my New Balance Trinamic Long-sleeve top. It made of a technical fabric designed to keep you warm while offered superb stretching and mobility. In addition it has laser cut perforations that help to allow it to breathe since the last thing you want is a base-layer saturated in sweat.

Softshell Pants

Outdoor Research Cirque

You will need a pair of wind and water-resistant, breathable, durable softshell pants that will stretch to allow for mobility on the mountain. After extensive online research I decided on the OR Cirque pants and found them to be perfect. I was comfortable, mobile, and warm. They also easily fit under the climbing harness and I found the several the zippered gear pockets to be extremely useful.

Bottom Base-Layer

New Balance NB Heat tight

A bottom base-layer needs to be warm, thin, and breathable.

I once again turned to the New Balance NB Heat technical apparel to get the job done. I was nervous at first of being too cold because of how thin the sum of my bottom layers were, yet I ended up being quite comfortable. You are working the entire climb and any more than this would have been too hot, causing me to sweat.

Underwear

New Balance Dry Fresh

Underwear should be lightweight and breathable. Synthetic dry fresh fabric made for a comfortable climb and will resist odors. It also will dry quickly to allow you to wash and reuse.

Personal Gear

  • Day Climbing Pack
  • Sleeping Bag
  • Water Bottle
  • Camera
  • Portable Battery Bank
  • Stuff Sacks
  • Sun Protection
  • Medications
  • Toiletries
  • Headphones/Ear plugs
  • Plastic Trash Bag
  • Snacks

Day Climbing Pack

Osprey Stratos 36

The day climbing pack was the hardest decision I had to make. I didn’t want it to be too big to make sure I was as light as possible when climbing, but I had to make sure it could hold all the gear I required.

I (luckily) found the Osprey Stratos 36L to be just big enough while having all the features required of a pack for this venture. The pack is lightweight, durable, and comfortable. The side zipper easy access zipper proved to be absolutely invaluable. In addition the pack comes with a rain cover, crampon storage, trekking pole loops, and an ice axe loop among a plethora of other features.

I will be using this pack again for the upcoming climbs but I would certainly recommend not going any smaller than the 36L.

This is something you must purchase and bring with you.

Sleeping Bag

Northface Furnace 20

A sleeping bag will be required to stay warm while trying to get a few hours of restless sleep at the base lodge.

For the last climb I used a rental sleeping bag, but to put it simply… it’s gross. It’s usually a damp, stained, questionably clean sleeping bag. You want to be able to relax as best you can before the big climb so I recommend investing in one of your own if your wallet and suitcase will allow for it.

The temperature in the base lodge will be the same as it is on the mountain, so get a bag with a low temperature rating.

The Northface Furnace also comes with an internal pocket that you can use to stow your camera, phone, and anything else with a battery to protect them from being drained by the cold.

Water bottle(s)

Nalgene 32 oz

You will be perspiring and exhaling water at an elevated rate and will need to get fluids in often during the climb.

You need a shatter-proof, leak-proof, BPA free water bottle. Do not make the mistake I did of bringing a bladder pack. The bladder pack will seem great… until the temperature drops and the hose inevitably freezes. An insulated hose will not prevent this. My bladder pack hose was insulated and froze within the first hour of our climb. Luckily I had Gatorade bottles stowed in my bag as well.

The movement from the climb should keep the fluids sloshing around and prevent your water bottle from freezing up on you before you need it.

Camera

GoPro Hero 7 Black

If you’re going to do epic things, you’ll want to get epic footage.

I use my iPhone for still photos, but I use the latest GoPro to get video of all of my adventures. Bring an extra battery with you and keep it in an internal pocket to make sure it stays warm to preserve the charge.

I use a combination of hand grips and helmet mounts for just about everything. Check out my channel for examples of some of the videos. A link to the Cotopaxi climb video can be found here:


Cotopaxi Climb Video

Portable Battery Bank

RavPower 22000 mAH

If you intend to use your camera and cell phone in the lodge or on your climb you will want to make sure you devices are fully charged when it matters most. I use the RavPower 22000 mAH and can charge all my devices simultaneously while in transit or when electricity is unavailable. When fully charged, this bank will recharge your devices a few times over. It has held up well for about 2 years now through several testing adventures.

If I were to do this again I would go with a smaller and lighter 16750 mAH RavPower battery bank.

Stuff Sacks

Sea to Summit Nylon

Stuff sacks are great for storing your down jacket in you pack when you don’t need it. They also are a great way to separate gear in your main pack compartment. Plus if you’re bringing a lot of your own gear, they can be a hero when it comes to creating space in your checked baggage by compressing your clothing.

A 6.5L stuff sack should be perfect for your down jacket, while still allowing you to fit your hardshell jacket in it when packing it into your checked baggage.

Sun Protection

The rest of the essentials are pretty generic, so I don’t see much reason to post pictures or specify the brands I used.

The level of ultraviolet radiation is extremely high at altitude due to the low density of the air, lack of cloud cover, and reflection off the snow and ice. You should apply sun screen and lip balm to all exposed skin before the climb and again at sunrise. Regardless of how cold it is, it is extremely easy to get burned.

Medications

Pack all your personal prescriptions.

In addition to this, acetazolamide (altitude medication), may be part of your arsenal. There are a lot of contradicting opinions on using altitude meds which I won’t get into. Proper acclimatization will be critical with or without the meds.

I also recommend having ibuprofen and Imodium on hand to combat some unfortunate symptoms of altitude sickness, should they occur.

Toiletries

First off, BRING YOUR OWN TOILET PAPER. There will not be any in the base lodges, and obviously none on the mountain if and when “nature calls”.

Outside of this bring what you think you need and nothing more. For me this was just deodorant, a toothbrush, and toothpaste.

There also will likely be no soap or running water at the base camps, so I’d recommend bringing some hand sanitizer with you.

Plastic Bag

Any waste you produce in the base lodge or in the trail must be removed with you. Bring a plastic shopping bag to put all your wrappers, bottles, tissues, etc. in for when you leave the mountain.

Keeps the mountains clean and beautiful for all the climbers to come!

Snacks

There are some very limited options available to purchase in the base camps. I recommend bringing the snacks and sports drinks you’ll want with you. Fast acting carbohydrates and calorically dense foods should definitely in your inventory as these will help to curb the effects of the altitude.

I packed Gatorades, Hershey bars, Oreos, and energy gels.

Note: Dinner should be served just before sunset at your base camp so these are just supplemental snacks.

The “Niceties”

  • Cash
  • Journal
  • Book

Cash

Besides being able to purchase food some of the base lodges also have some pretty awesome merchandise for sale that’s only available at the lodge and can only be bought with cash.

You also should plan on tipping your guide. These guys work HARD every single day.

Journal

In the moment everyone overestimates their brain and believes that every minute detail of the trip will be burned into their memory. Unfortunately, this just isn’t the case. Having a journal to jot down details and notes in will be a treasured item a few months after the climb.

Book

You won’t have much time to read in the base camp, but having a good book on hand can kill some time if you are unable to sleep and help calm the nerves by keep your mind busy. (Maybe save Jon Krakauer’s “Into Thin Air” for the flight home.)

Closing Notes and Recommendations

The most important thing when preparing for the climb is to keep your mind healthy as mental fortitude is, in my opinion, the most important trait to have.

With this packing list I hope to take some of the stress out of packing for an adventure like this for the novice climber. Making it to the summit is a huge accomplishment, and I believe this packing list will give you the best shot at achieving it!

One final simple recommendation I have is to train hard to prepare physically for the climb. This is NOT just some hike on a trail. This is an incredibly difficult endurance climb in low oxygen conditions, freezing cold, and dangerous conditions. I recommend a combination of leg and core strength-focused HIIT workouts and long endurance runs, hikes, and bike rides. I intend to follow this blog up with a detailed training regimen to prepare for your high altitude mountaineering adventure.

For some photos from the previous climbs or to follow along during this venture, photos and videos will be going up on the YouTube channel and on Instagram.

Instagram Link

YouTube Link

Good luck!